Welcome to our Knowledge Base
-
System Settings
-
- Articles coming soon
-
- Upload Students (Video)
- Upload Students
- Manage Students
- Upload Student Pictures
- User Accounts
- Upload User Accounts
- User Permissions
- Mass Updates
- Manage Family and Guests
- Printer Setup - 3" Thermal (Windows)
- Printer Setup - 3" Thermal (Mac) **Advanced Setup**
- Printer Setup - 3" Thermal Network (Mac) **Advanced Setup**
- Preparing for Next School Year
- Microsoft Single Sign-On (SSO)
-
Store
-
- Articles coming soon
-
- Creating a Transaction
- Scanning a Student ID
- Student Credit
- Student Credit - Credit Refunds
- Product Buttons
- Returns
- Printing Receipts
- Payment Type
- Modify Transaction - Post Sale
- E-mail Receipts
- ProPay: How to Void a Transaction
- ProPay: How to Process Credit Cards
- Reprint Receipt and Resend Receipt by E-mail
- Exporting Ticket Sales from Store to Ticketing for Checkin
- Changing Payment Type After Transaction has Completed
- Portal Purchased Product Pickup and Reports
- Discount Options
- PAX Credit Card Reader Setup
- Show all articles ( 3 ) Collapse Articles
-
- Upload Students (Video)
- Upload Students
- Upload Student Pictures
- Student Type
- Student Spirit Points
- Student Credit
- Upload Student Credit
- Managing Student Credit
- Student Credit - Credit Refunds
- Manage Spirit Points
- Mass Updates
- Discount Options
- Manage Students
- Family and Guest Management
- Manage Family and Guests
-
- Accessing the Open Store Portal
- Accessing the Student Only Store Portal
- Family and Guest Management
- Configure your Portal and Products
- Portal Purchased Product Pickup and Reports
- Manage Family and Guests
- ProPay (Heartland) Merchant Account
- Google Single Sign-On (SSO)
- Family Portal
- Microsoft Single Sign-On (SSO)
-
- User Accounts
- Upload User Accounts
- User Permissions
- Taxes
- Paysafe: PCI Compliance
- Cash Drawer (Connected to Thermal Printer)
- Cash Drawer (USB) Windows 10
- Product History (Link on Current Transaction)
- Product Agreement
- Accessing the Student Only Store Portal
- Configure your Portal and Products
- Portal Purchased Product Pickup and Reports
- My Account
- SFTP Automated Student Rosters
- Accessing the Open Store Portal
- ProPay (Heartland) Merchant Account
- School Logo
- PAX Credit Card Reader Setup
- Whitelist URL's
- Show all articles ( 4 ) Collapse Articles
-
- System Settings Getting Started (Video)
- User Accounts
- User Permissions
- Upload User Accounts
- Upload Student Pictures
- Remote Support
- Mass Updates
- ProPay (Heartland) Merchant Account
- School Logo
- Google Single Sign-On (SSO)
- PAX Credit Card Reader Setup
- Preparing for Next School Year
- Microsoft Single Sign-On (SSO)
-
Voting
-
- Adding an Election
- Adding Officer Positions
- Adding Candidates
- Election Preflight
- Removing Candidates
- Adding Pictures and Biographies
- Archive and Retrieve Old Elections
- Duplicate an Election
- Using Video Biographies
- Election Layout Options
- Preview an Election
- Write-in Candidates
- Create a Survey (Video)
-
- User Accounts
- User Permissions
- Upload User Accounts
- Configure the Student Login Page
- Require Student E-mail
- Notifications for Unsuccessful Student Login Attempts
- Hobbies and Biography
- My Account
- Require Change Passwords
- SFTP Automated Student Rosters
- Google Single Sign-On (SSO)
- School Logo
- Whitelist URL's
-
Ticketing
-
Interventions
-
- Articles coming soon
-
- User Accounts
- Upload User Accounts
- User Permissions
- Printer Setup - 3" Thermal (Windows)
- Printer Setup - 3" Thermal (Mac) **Advanced Setup**
- Printer Setup - 3" Thermal Network (Mac) **Advanced Setup**
- Interventions
- Bell Schedules
- My Account
- SFTP Automated Student Rosters
- School Logo
- Mass Updates
- Whitelist URL's
-
Announcements
-
Student / Family Portal
-
Digital ID
Dashboard Overview
The dashboard has an overview of the days announcements and easy access to Software 4 Schools Notifications. This is your home screen which appears once you successfully login.

-
Here is the top bar menu where you can access Announcements (to view, create and read email announcements), Calendar, Reports and Configure (manage groups, access codes etc).
-
This is the dashboard where current day’s announcements appear as well as birthdays.
-
At the bottom of the page, Software 4 Schools notifications appear.
Below is the brief overview of your dashboard and home screen:
Needs Approval
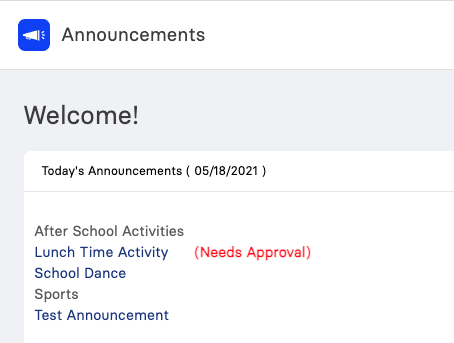
-
Announcements that require approval will appear on your home screen dashboard with a label that states Needs Approval. Click on that announcement to edit and approve the same.
-
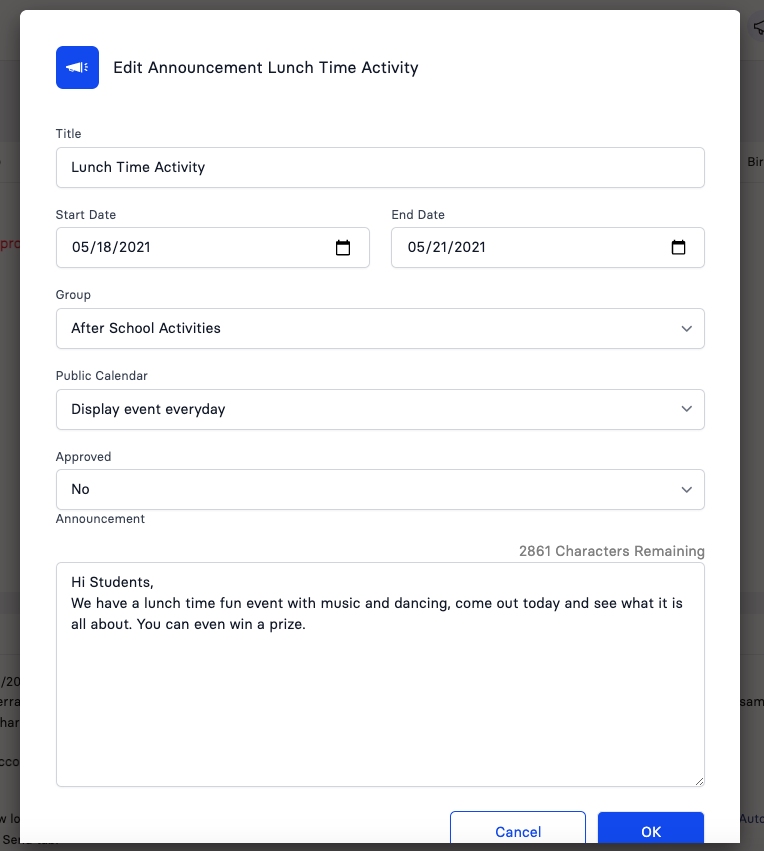
Select Yes from the Approved dropdown.
-
You can make necessary edits as well. To update the information, click on the OK button.
When an announcement is clicked from the dashboard, a pop-up window appears allowing the user to edit the announcement.
Explore Other Programs
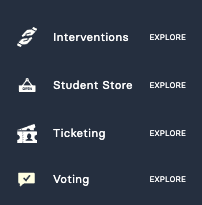
-
If you wish to learn about our other programs/products then you may click on these links available at the left-menu of your home screen.
Logout
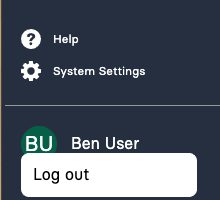
- You can logout from the application by clicking on your user name appearing at the left-menu. Once you click on your name, the option to Log Out is visible.