Welcome to our Knowledge Base
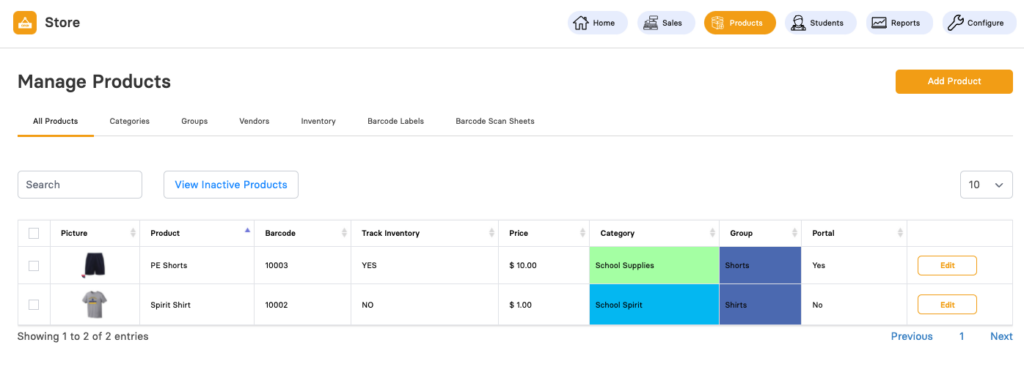
Manage Products
-
You can use the search filter by typing text in the Search textbox
-
By default, active products are displayed. You can view the inactive ones by clicking on View Inactive Products button.
-
To add a new product, click on the Add Product button.
-
To make the changes in the already added products, click on the Edit button.
Click on the Products button available on the top bar and select the tab for All Products.
-
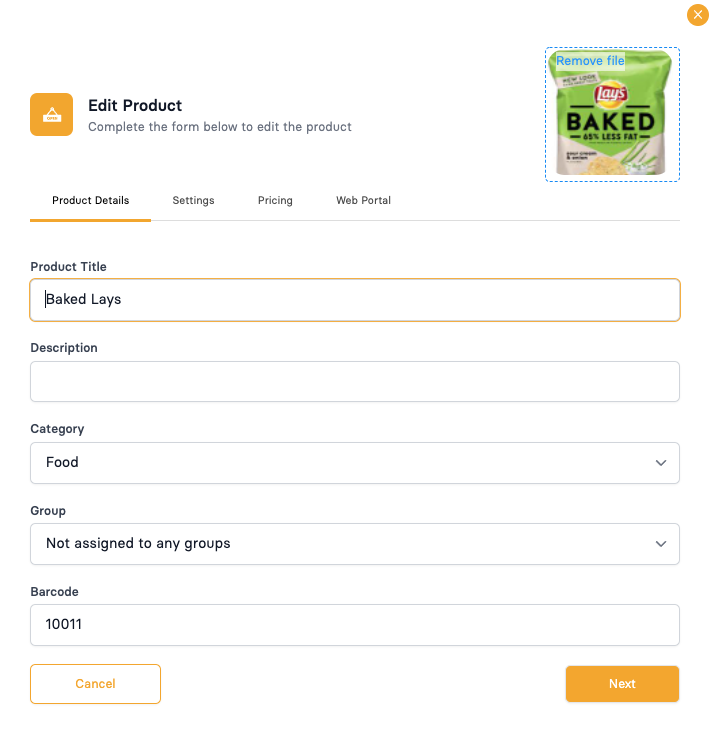
Across the top are 4 tabs that allow you to edit each part of the product.
-
The picture will show up on the sales screen and the web portal. Loading a smaller image (file size) will keep the page loading fast.
-
The product title will show up on the product button, we recommend keeping this short.
-
The description is an internal for your reference, it is not displayed on the screen at this time.
-
The Category list will show all active categories that you have created. You must have at least one category to create a product.
-
You can group items together to make one button open up to several products. For example you might want Small / Medium and Large Shirts all under a shirt button. The dropdown will only show groups that are available within a category. This is not a required field.
-
If you are selling a product that already has a barcode, scan it in here. You can type any number or letter combination and create your own barcodes or you can skip this and the system will auto generate a new barcode.
The Add / Edit product screens work the same.
-
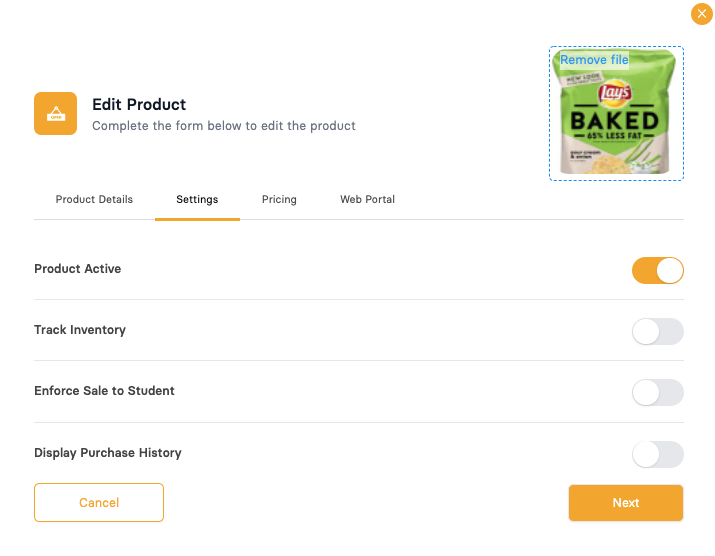
Click Settings to go into the settings for the product.
-
Product active determines if the product can be sold. If you no longer sell a product change the switch to off (gray no Orange) this product in our example is currently active.
-
If you are tracking inventory, turn this on. The product will show up on your sales screen but the button will be inactive until you add inventory.
-
When Enforce Sale to a Student is turned on, you can not sell this product unless you scan a student first. A good example here would be a yearbook and you need to know how bought it so you can deliver it to them at the end of the year. If you are selling granola bars for example, you might want to leave this off so you don’t have to scan the student.
-
The Display purchase history will show the last time the student purchased that product. The student must be scanned in to display that. This is useful when a student wants to know if they purchased a yearbook for the school year or not.
Settings Tab
-
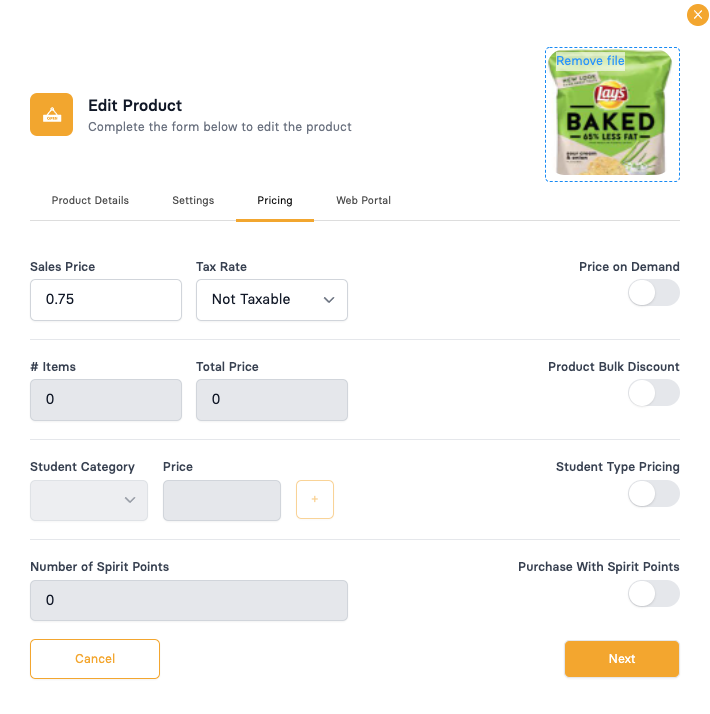
Click Pricing to go into the pricing for the product.
-
Set the product price in the first box. If it is taxable you can choose your tax rate. You do need to configure that under the Configure page.
-
Price on demand turns off the product price and makes it so there is a text box and the user can determine the price of the product at the time of sale.
-
If you switch the Product Bulk Discount on (Orange) you can set the quantity at which the product gets discounted and the total price for the entire quantity. For example if you sell a candygram for .50 and 3 for a $1.00 you would put the # Items = 3 and the Total Price = $1.00
-
Student Category pricing allows you to have a different price sale for different studnets. Many schools will load their staff in there for example and you can create a “Student Category” called staff. Then all your staff members can have a specific price for that item. If you have multiple Student Categories you can click the + sign to add another.
-
If you are giving your item out in exchange for Spirit points you can turn that on and choose the number of points that students will exchange for the product. When this is turned on and a student payment type is turned to spirit points this product will change from $ to points.
Pricing Tab
-
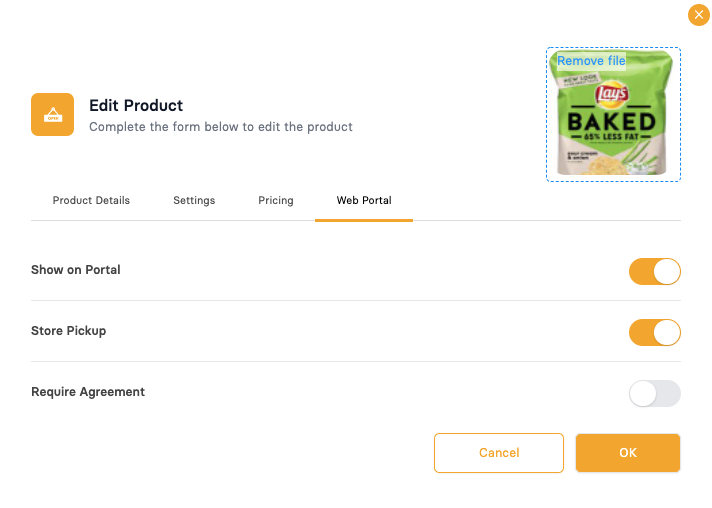
Click Web Portal to go into the Portal Setup for the product.
-
If you want this product to be sold on the portal, you can turn it on here. At any point throughout the life of the product you can turn this on or off from here.
-
If the product is a physical product and needs to be picked up (for example a shirt) you can set it for Store Pickup. This then will prompt the sales clerk to provide the item when the student is scanned in.
-
If there is any agreement that the user must agree with at the time of sale you can turn that on and add a title and description. Those boxes will show up below when that is turned on. (not displayed above)
Web Portal Tab