Welcome to our Knowledge Base
Manage Spirit Points
To get started you need to enable Spirit Points. Go to System Values under Settings accessible from the left menu.
Near the bottom you will find an option "Use Spirit Points". Click on the Edit button and set this to Yes.
If you want students to be able to login and view or spend their spirit points you can enable the public portal using Enable using store credit or spirit points. If you are not using the portal for students then you can leave this as disabled.
Note: If you are selling physical items, set the option "Store Pickup" to On when you setup the product.

-
Select the tab for Spirit Points.
-
Click on the Upload button. Read below for more details.
You can upload student spirit points from a file directly into the system. To access, click on the Students button available at the top bar.
Click on the File button and select the file from your device or computer. The file format should be Excel or CSV (Comma Separated Values).
After you select the file, click on the Load button to align the columns.

-
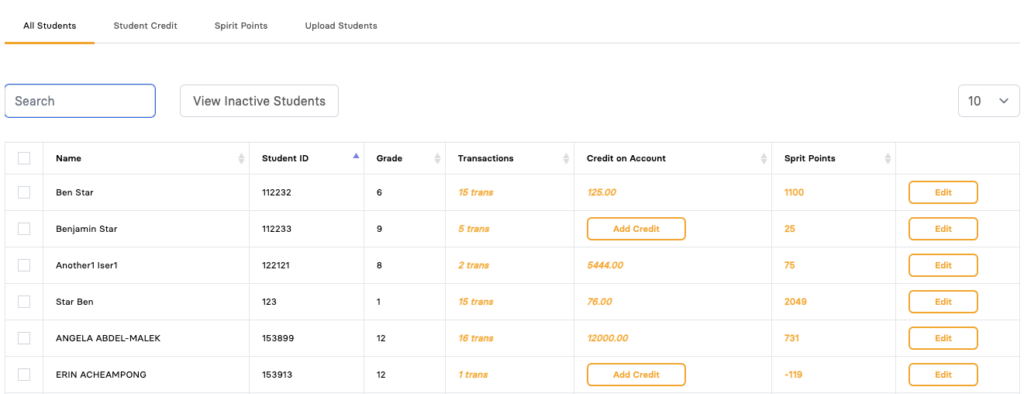
To add spirt points, click on the Add Points button if the student has never received any points or if they have points, click on the number of points in the column.
Spirit points can be uploaded or added manually from the students page. Spirit points can also be added from Voting (when participating in an election) or Ticketing (when a student is scanned into an event)
-
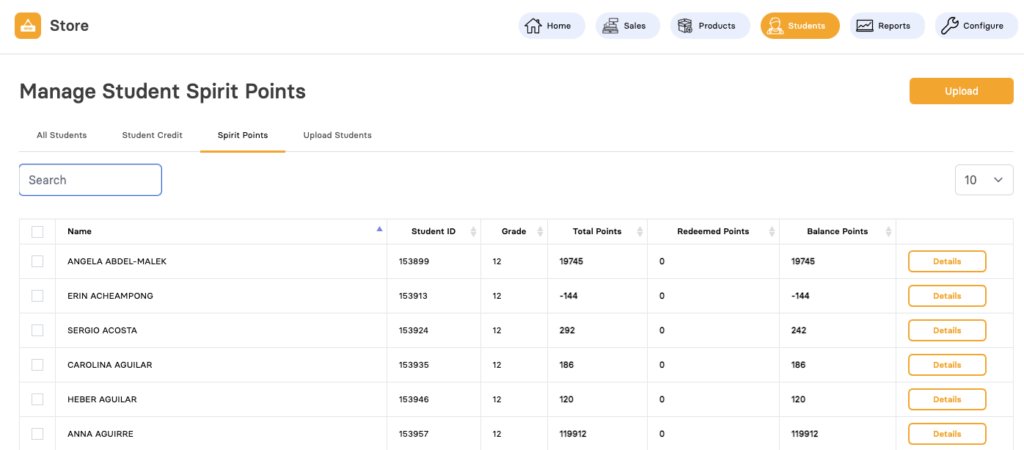
Select the tab for Spirit Points.
-
Quick Search to look up any student by name or ID number.
-
Total Points is the collective number of points that the student has received.
-
Redeemed Points is how many points have been used by that student.
-
Balance Points is the number of remaining points the student has left to spend.
-
Details will allow you to see the breakdown and allow you to add more points to the student account.
The Manage Student Spirit Point page will only display students that have had spirit points at any point in time. Even if their balance is 0 (as they have spent all their points) they will still show up on this page. If a student has never had any spirit points they will not show up on this page. To access, click on the Students button available at the top bar.
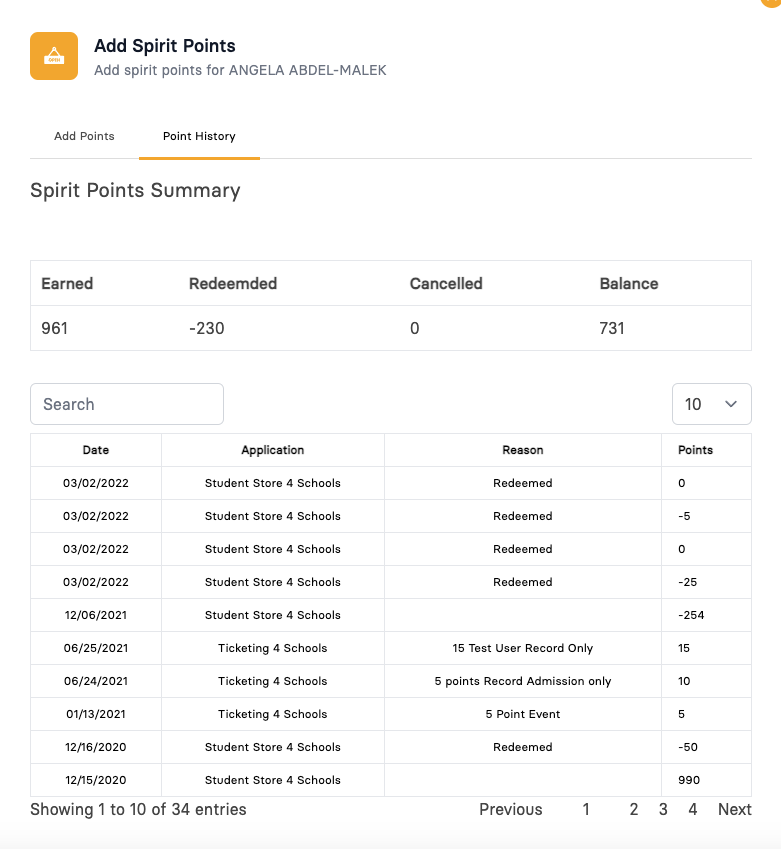
You can select the tab for Point History and view the details such as how many total points the student has earned, how many have been used or canceled and the balance they have left.
When a student is scanned, you will see the total points available

When the payment type is set to Spirit Points all Items that are allowed to be purchased with spirit points will be displayed.
